background

Wednesday, May 29, 2013

Mini quilt of mustaches

The progress on my new sewing room is coming along.  I am planning on having a group of mini quilts on one of the walls.  This week was a great week to get one finished.  I wanted to do a brief tutorial on the way that I appliquéd the quilt.  This method could be used for almost any appliqué project you may have.

I chose to leave my edges raw because I think this look will compliment the mustaches.  But, you could use this method with turned under edges.  I will give those instructions in parenthesis.
Grab the design you would like and trace it on the paper side of wax paper.  After you have it traced, cut it out.
 Place the wax side on the right side of your fabric and iron to attach.  The best part about the wax paper is that it can be repositioned if needed.
Cut out your design along the paper and remove.  (If you plan to turn under your edges, cut with a 1/4” to 1/8” fabric border around the paper.  Then, simply remove the paper and place it paper side down on the wrong side of the paper.  Use your iron to fold over the extra fabric.  It will stick to the wax.  Remove paper and attach as desired). 
 You can certainly use a spray adhesive.  I don’t because I find that they tend to gum up your needle.  Plus, the bonus for this project is that the pieces are easy to pin and hold.  I did a scant seam along the outside of each mustache.
I took a picture of the back just so you could see the stitching.
 Baste as desired.  I use the pin to the floor with T pins method.  I tend to over pin.  But, with that said, I tend to not have much shifting of the quilt sandwich during quilting.
 Quilt as desired.  I outlined each mustache and then stippled the top.  I also redid the inner scant seam of each mustache.


Thursday, May 23, 2013

oilcloth chair proctector


We recently purchased new table and chairs, and having a one-year-old, I wanted to protect the chair his highchair goes on.

In case anyone wants to know how I did it, here are the step-by-step instructions:


First trace around the seat on to some paper.  I used wrapping paper with gridlines on the back. 
 
Next, draw lines 1/2" from the chair seat outline along the two sides and front.  Then draw a third outline for how long you want it to hang over the sides of the chair (I did 4 inches) keeping in mind you will fold it under 1/2". 
 
In the two front corners, draw a parallel line from the ½” seam line to the 4” line.  Do this on both sides, and the front of the pattern.  Because I'm a visual person, I drew a Diagram. 
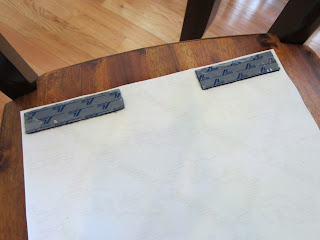
Be sure to account for the back chair rails, if you have any.  I also made the back piece longer than 4” to ensure it wrapped under the chair.  After I cut my pattern out of the wrapping paper, I laid it on the chair to make sure it would fit properly.

Tape all the way around the pattern to your oilcloth – it doesn’t matter if it’s on the right or wrong side.  Then cut out the pattern.  The tape will reinforce the edges of your pattern, if you wish to cover more chairs or for future use.  I only needed to do one chair, but I never throw my patterns away. 


With the right sides together, sew the front two corners together with a 1/2" seam.  You should have an angle at the top.


Oilcloth doesn’t fray, but for a nice finish, fold the bottom under once about ½” and hold in place with hair clips - pins will poke holes in the oilcloth.  Place tissue paper on top of the oilcloth.  The tissue paper will prevent the presser foot from sticking to the oilcloth and ruining it, then it’s easy to rip off when you’re finished.  NOTE: you will need to use a size 16 or denim needle and long stitches (I used length #4).  Sew the seam 1/4" all the way around to include both sides and the front.  I also folded in the back of the sides so they hang straight down. 


Lastly, I cut the back piece straight on both sides and attached self-adhesive Velcro to the bottom edges of the oilcloth and attached it under the chair. 


This is a picture from the back:


The finshed product:


Saturday, May 18, 2013

Hexagons all in a row

I can’t remember the actually name of this pattern.  It was very fun to make.  I used 1 layer cake and muslin for the top (sans border).  This is actually one of my new top favorite quilts.
 For the quilting I did stippling on the inner muslin, swirls on the outer muslin and stippling on the border.  For the inner blocks I did a ¼ inch outline.

Thursday, May 9, 2013

citrus coasters


One day I was looking online for patterns and came across these coasters.  I thought they were really cute and different, and they were really easy to make!  I like the look of the white stitching in the sections, but wish I would have matched the thread with the felt around the edges.  I used invisible thread, so while I’m pleased with the results, the thread was difficult to use.  But these were so easy (and inexpensive) to make, that I might just make more.  And maybe next time I’ll use darker colors for the grapefruit and lime.  Go to this blog for the pattern (and other really cute ideas!).